For my good friend Josh, the new owner of this old lockset.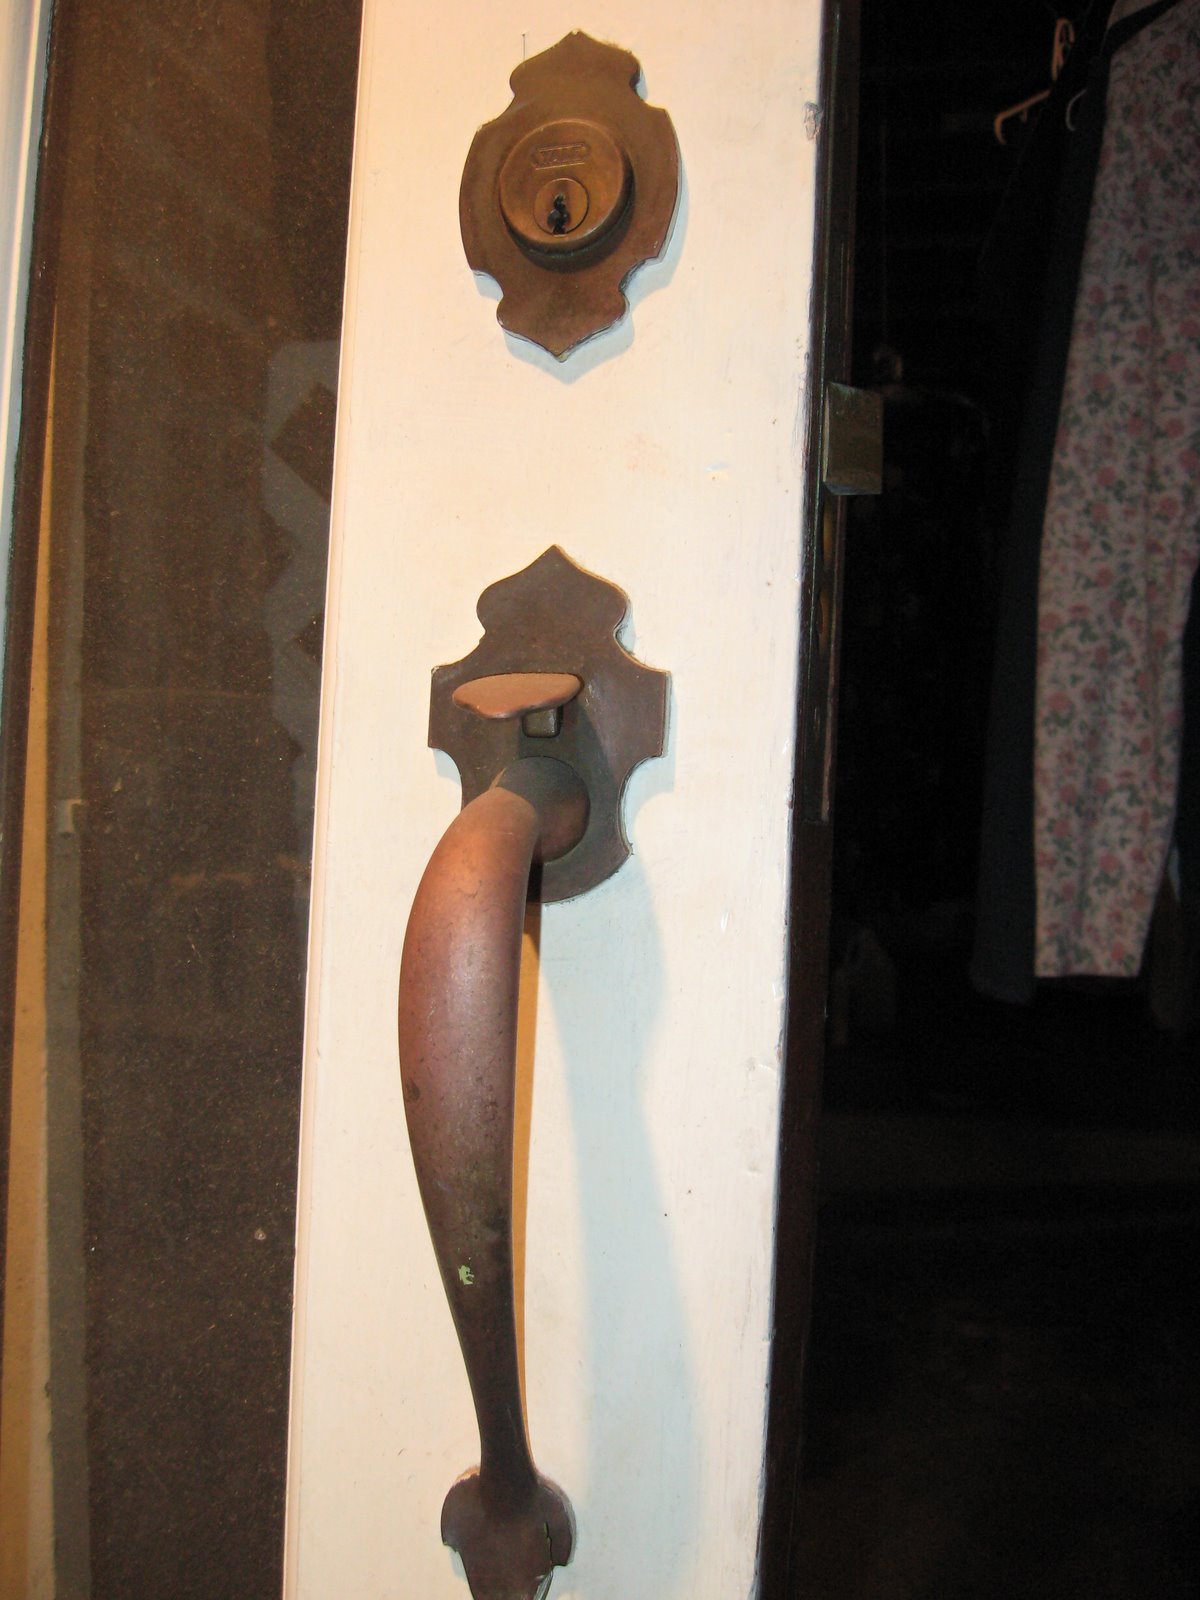 The exterior.
 Side view showing how it all fits together. The thumblatch part is just a bit lower than the knob.
 The interior. That spot above the doorknob should be the back of the deadbolt. I don’t know what ever happened to that- it didn’t come with the door, sorry.
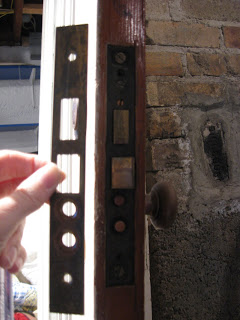
Two attempts to show how the first plate comes off. There is a second plate, then the lockset.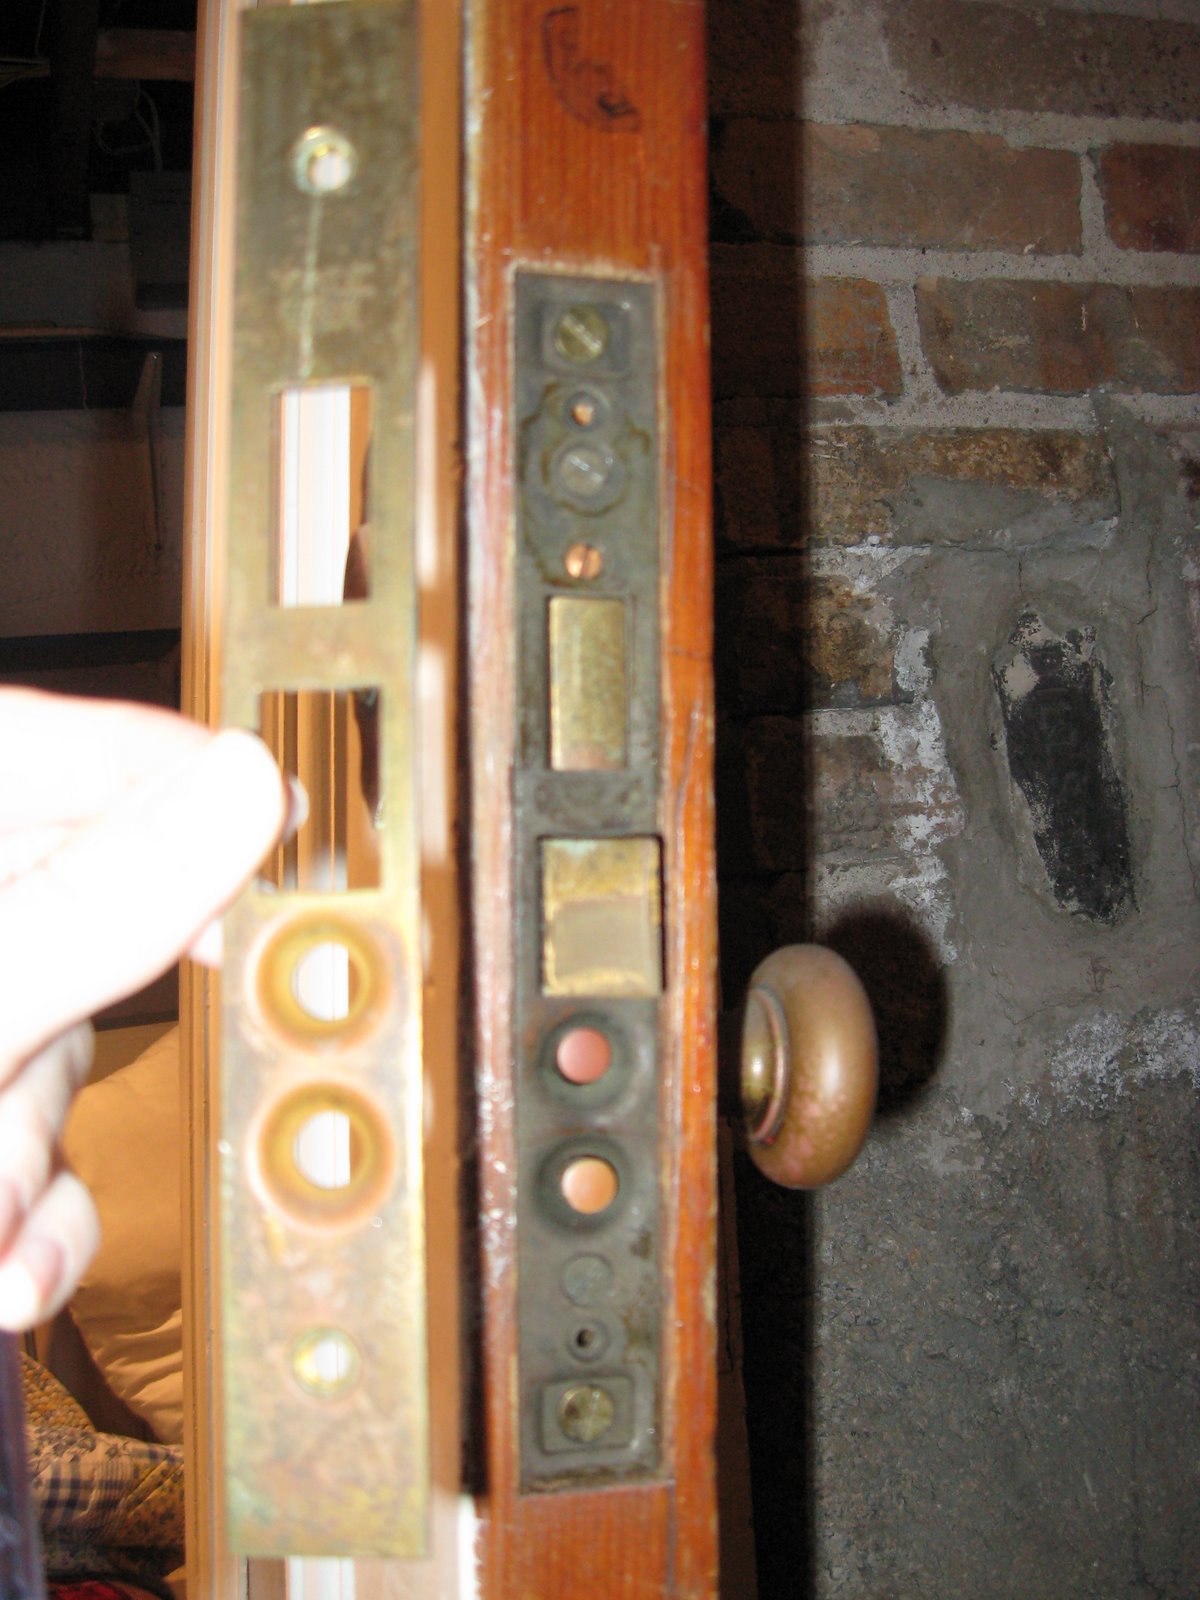 The thumb latch, doorknob, and dead bolt all had to be removed before I could get the lockset out.
Oliver’s Bungalow Blog
For Bill and Jack


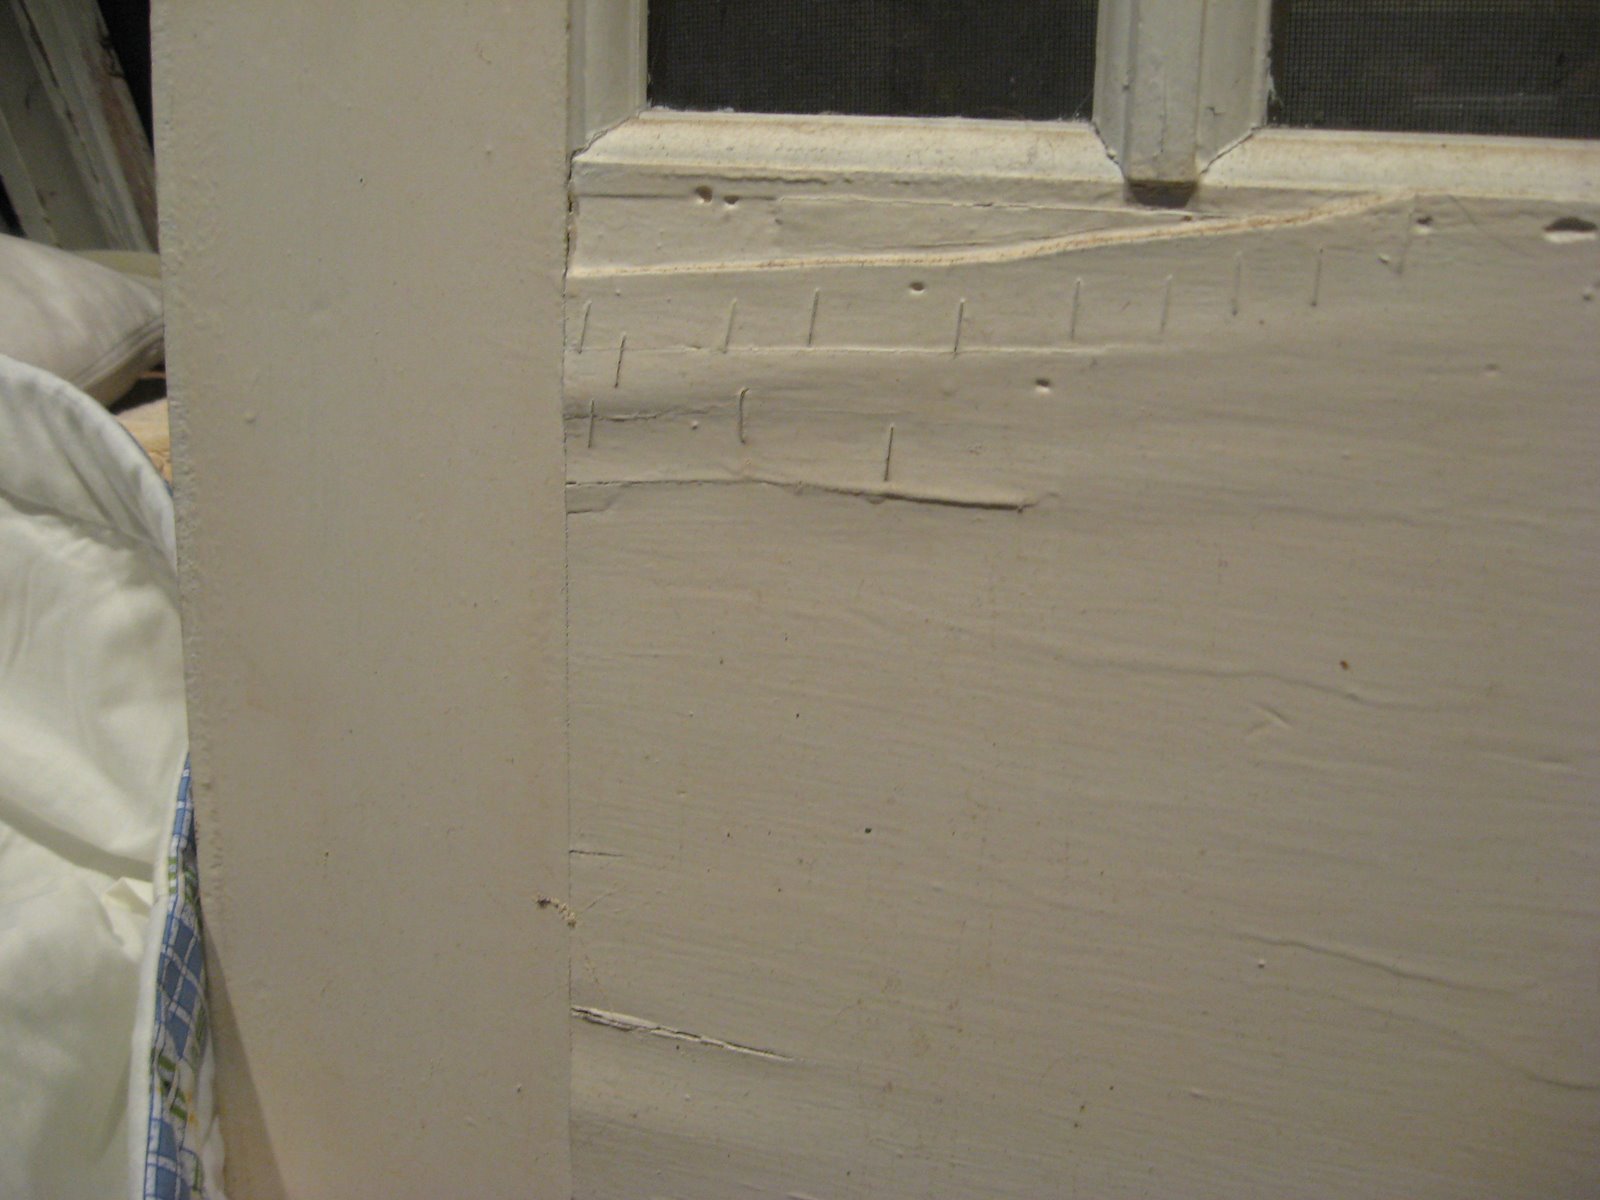 Staples! Yes, the wood bubbled, and they tacked it down with staples. Ordinary staples, nothing industrial, thankfully.
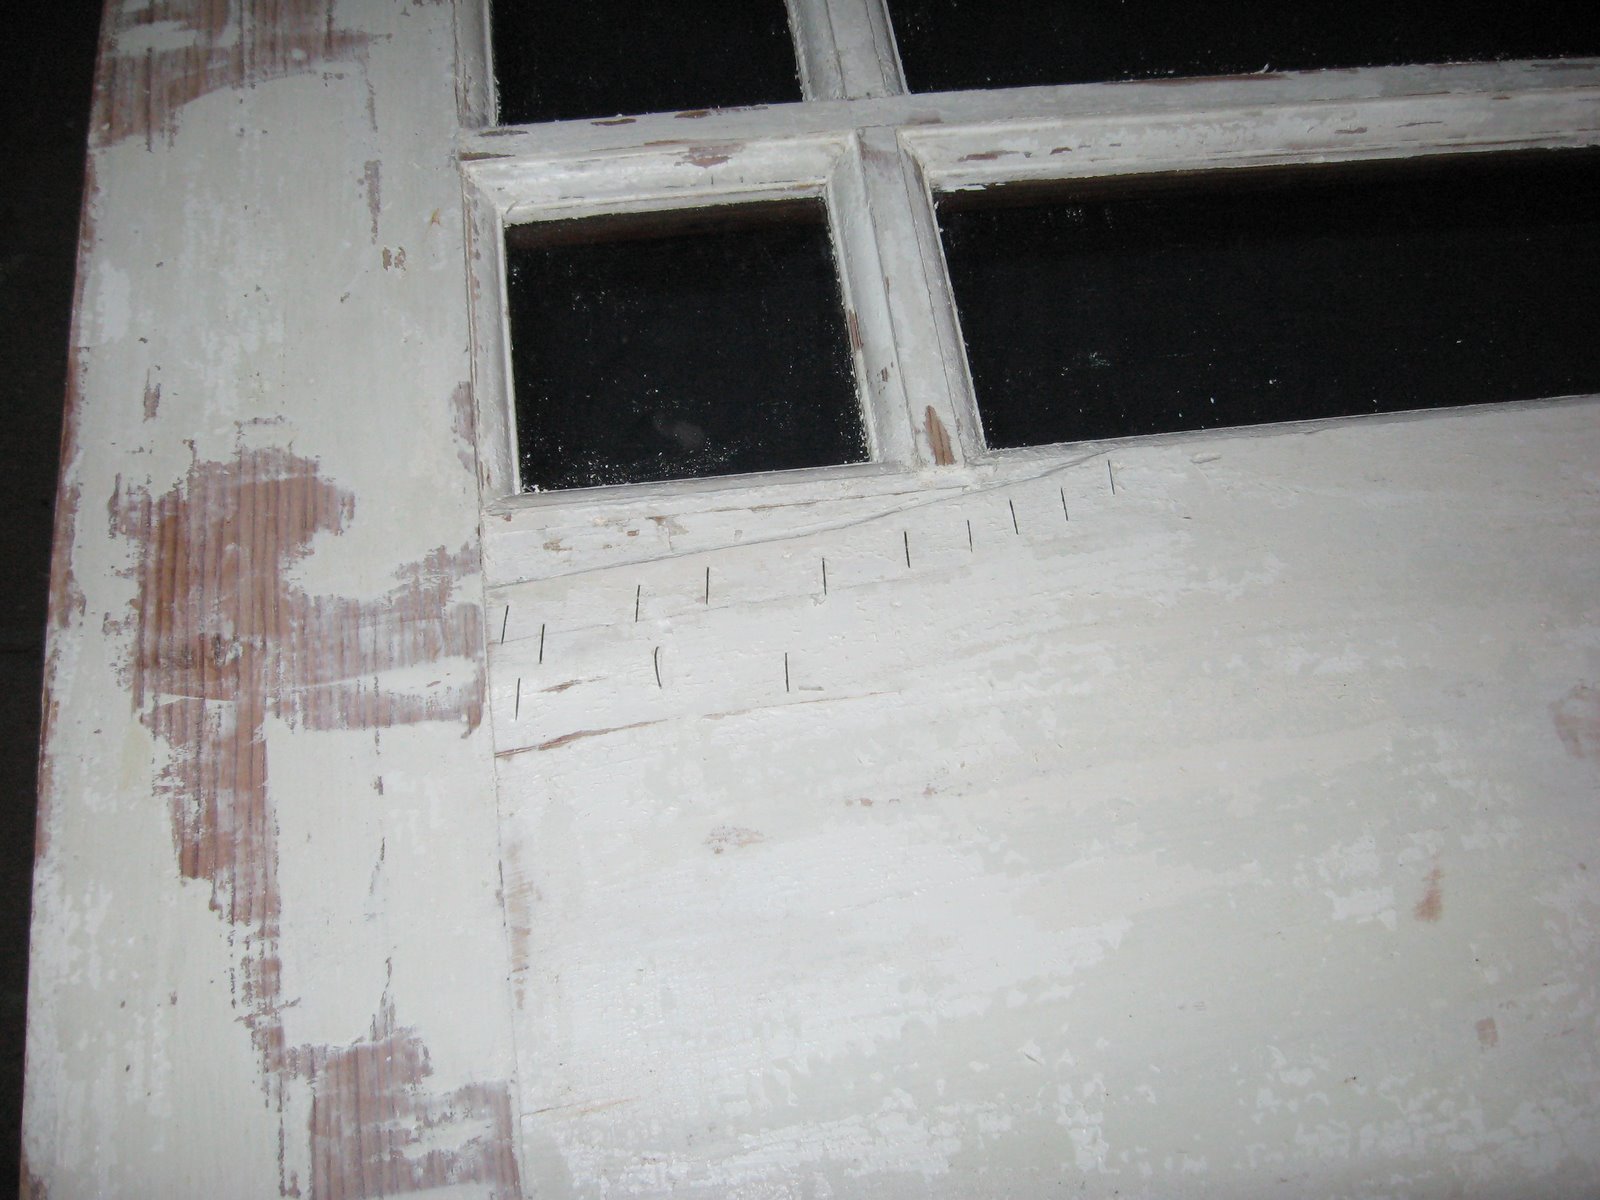 More on this project soon…
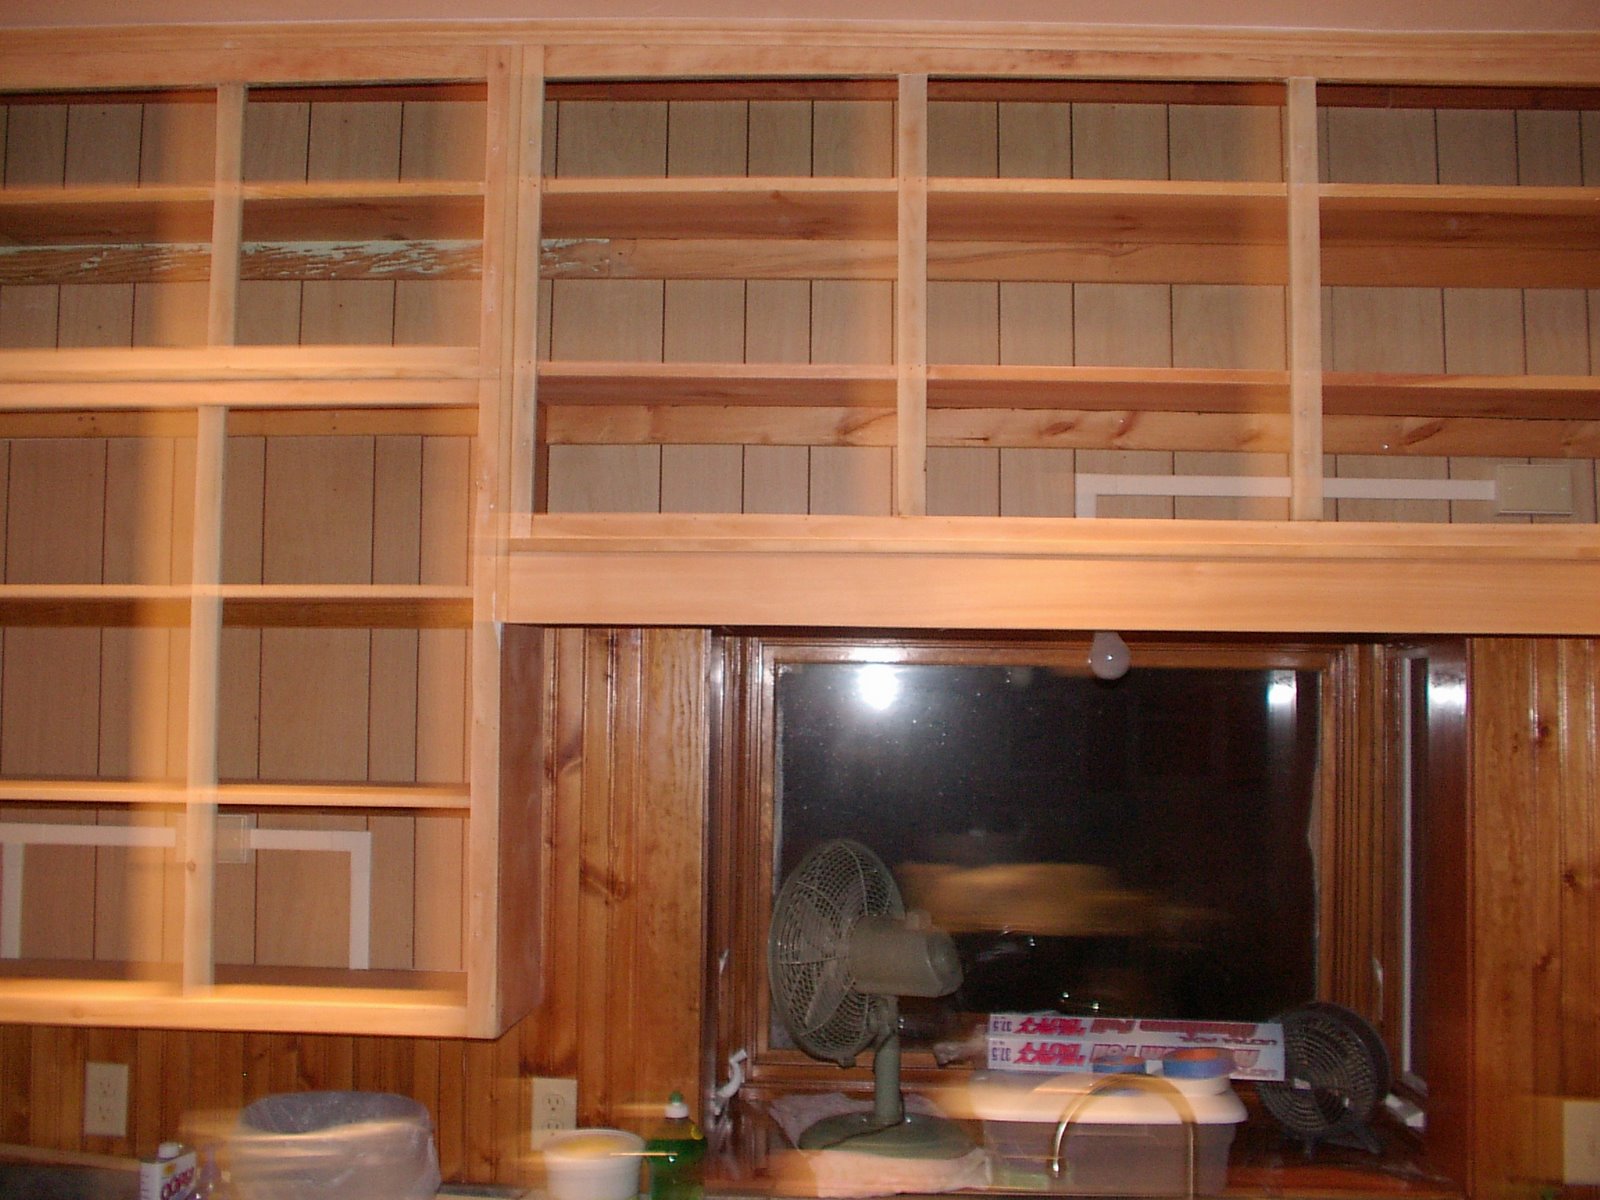
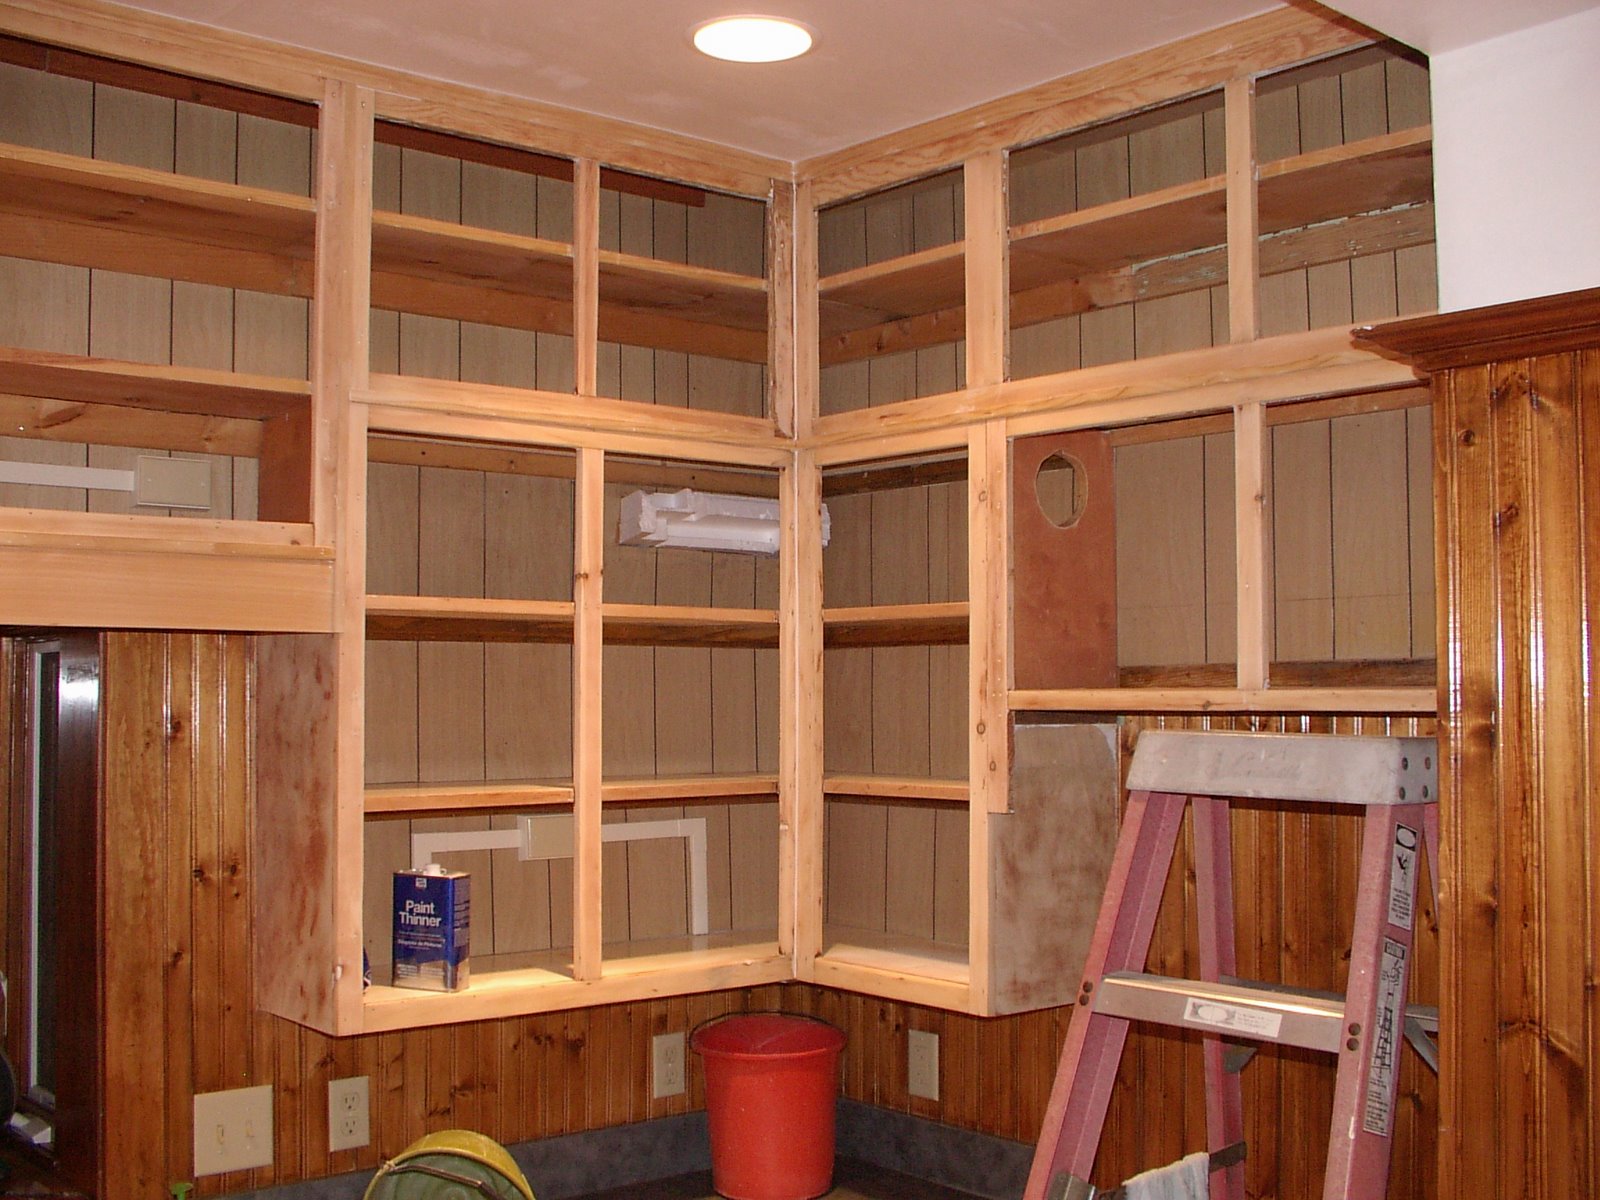
Kitchen Cabinets Bare
I found some more pictures that we took in February of 2006, just after mom and I finished sanding the cupboards, right about the time we started painting. This gives you a good idea of what the backs looked like before.
If you haven’t seen what they look like now, check out this post.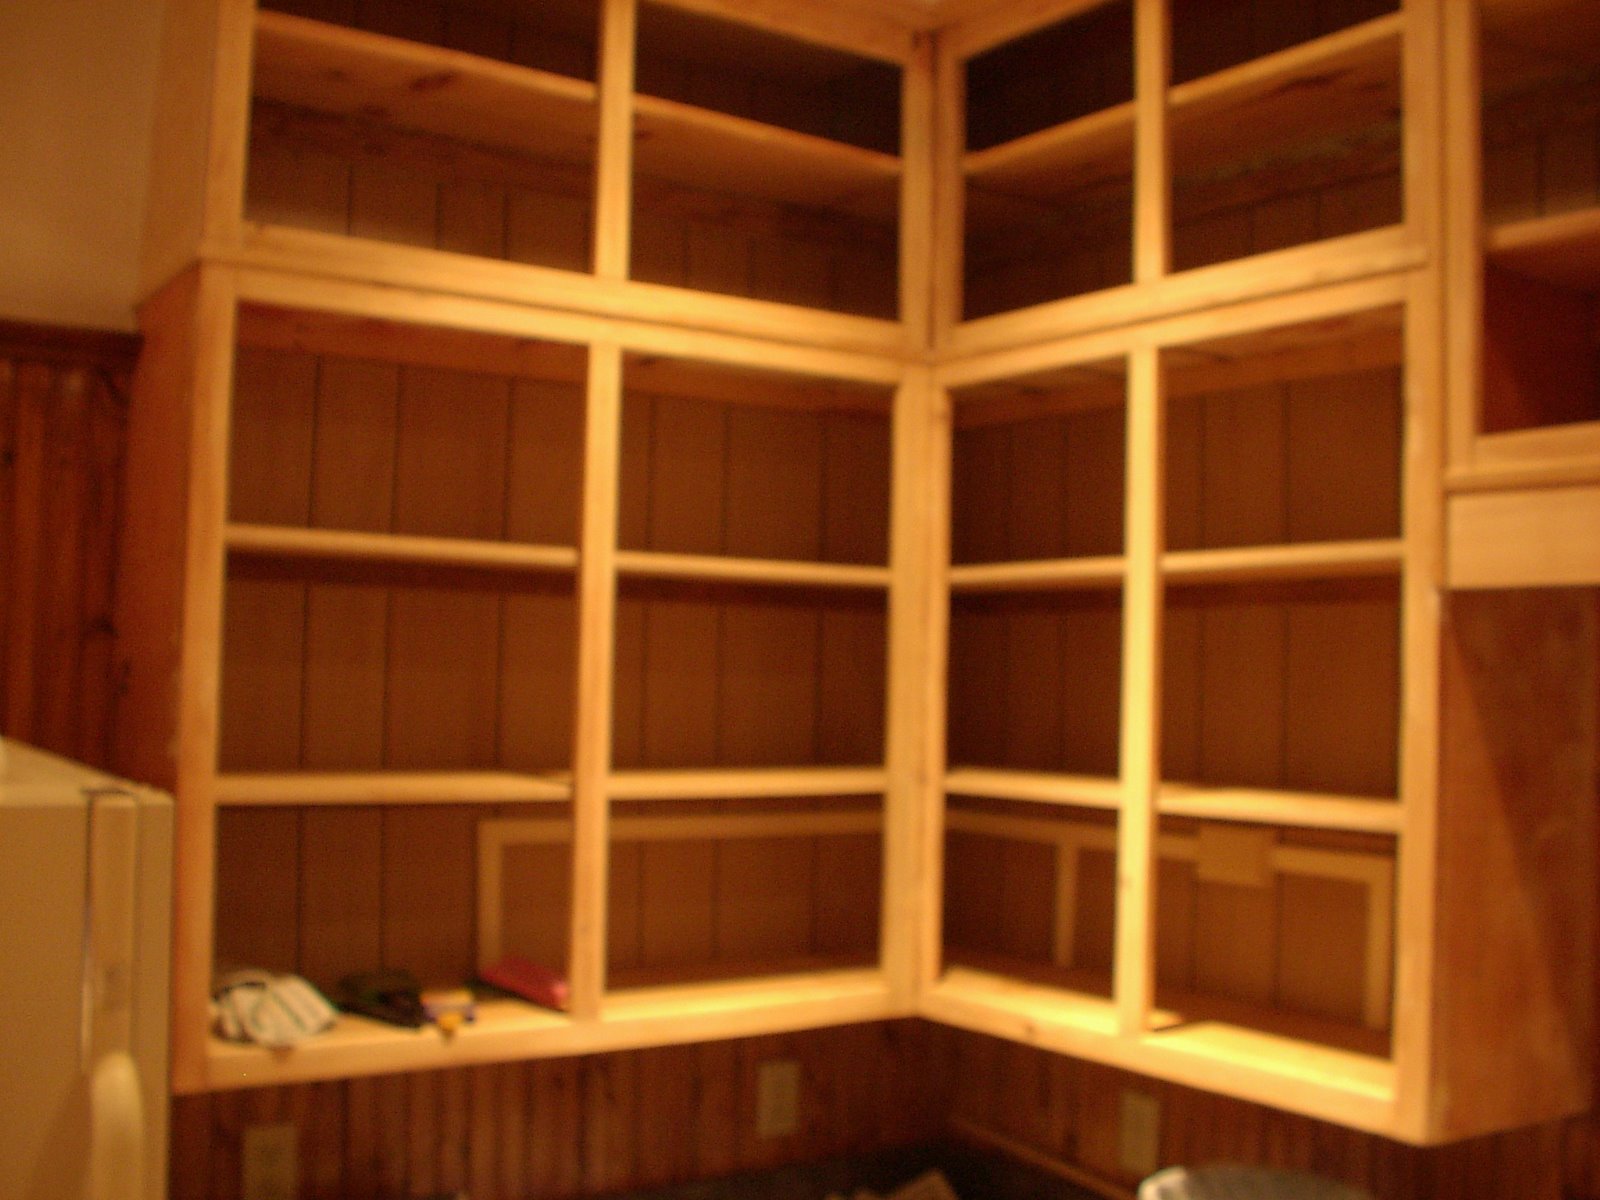


Trimwork Question Answered
Recently, di asked…
“Hi again. Just curious: what color stain did you use on your trim, and what
species of wood is it? Thanks!”
Well di, all of the original wood trim and doors in the house are American chestnut. The few places where we had to replicate trim in a room full of chestnut, we used red oak. The floors are white oak with white pine centers.
As for the stain… the simple answer is that nearly every room is different. The long answer is that every room was made to match itself because of the variety of conditions. In some rooms the trim had been painted white, when this was stripped, there was some white paint that simply would not come out of the grain. So, what the guys did was to wipe a stain or dye on, and wipe it right back off. It stuck to the paint, leaving the rest of the wood mostly its original color.
In other rooms, the trim had been painted wild colors like lilac, mint green, and even black. Yes, black. We kept coming up with this black, tarry stuff as we stripped the living room and entry, including on the fluted columns. We might never have known if I hadn’t had a surprise visit from some ladies who grew up in the house around 1950-1970. They told me their mother was the first to paint the trim. She loved the mint green wall color she chose to go with the black trim. I can only assume this took place during the 60s. Anyway, these wild colors required a bit more work to get the wood back to a normal color. Different stains and dyes were mixed, and different combinations were used for different rooms. I’m sorry I don’t have a more definitive answer.
House Tour: Upstairs Hall After
And now, today, the upstairs hall looks like this: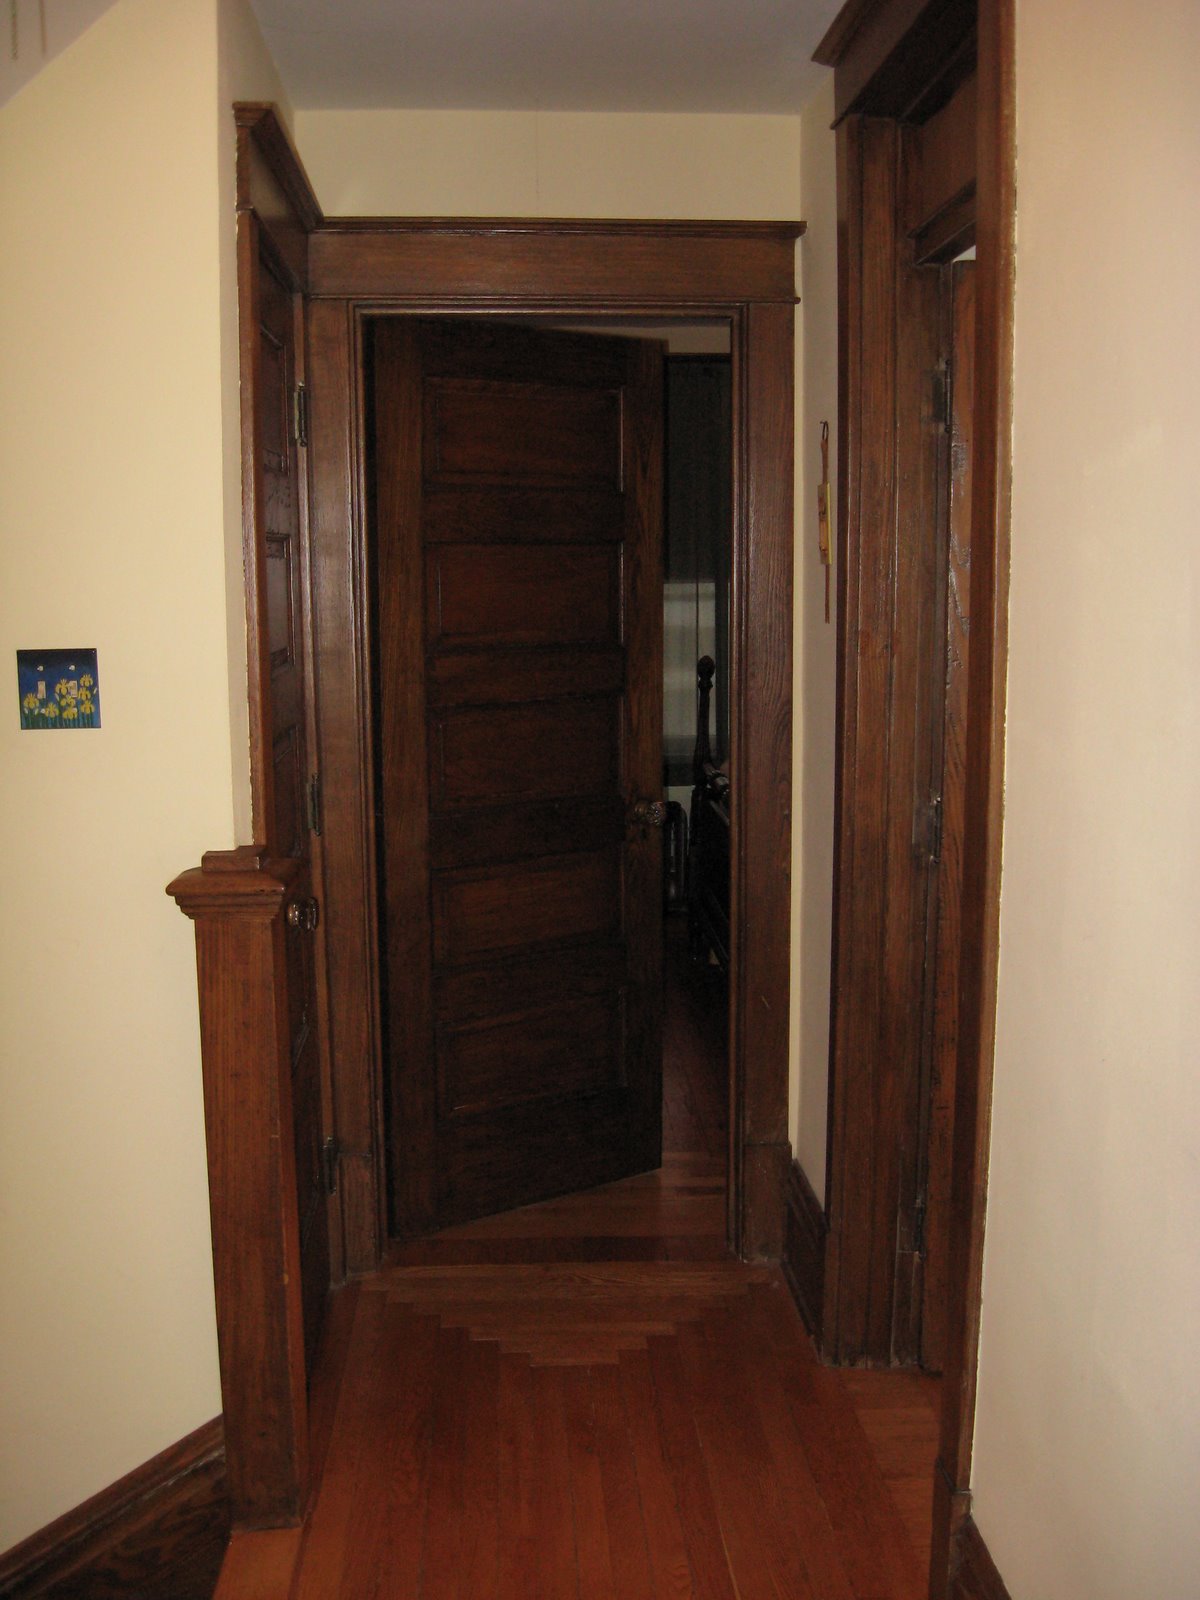 This is the view toward the front of the house. At the far left we have the staircase to the first floor, the door to the linen closet, the door to the front bedroom straight ahead, and the door to the side bedroom to the right.
No huge changes here, just repaired plaster walls, a new plaster ceiling, the carpet is gone, the wood floor is refinished, and all the trimwork has been stripped. You may notice there is a transom above the door to the side bedroom. I do have the window that goes there, but I need to purchase the hardware to make it operable before I can reinstall it. Right now the space is filled with cardboard (classy, I know). This is only temporary, and was put into place to keep that room cool this summer, because we only have window units right now.
Speaking of keeping things cool in the summer, we have installed a lovely whole-house fan. I love this thing. I do wish it weren’t plastic, but what can you do? I’m told this model is special because of the way it is made, none of the joists had to be cut, the center of the fan rests on one and the fan takes up the space between two joists. Anyway, I’m so glad we put this in because it really helps keep the house cool most warm days. It is only during the most sweltering part of the summer that we resort to the air conditioners.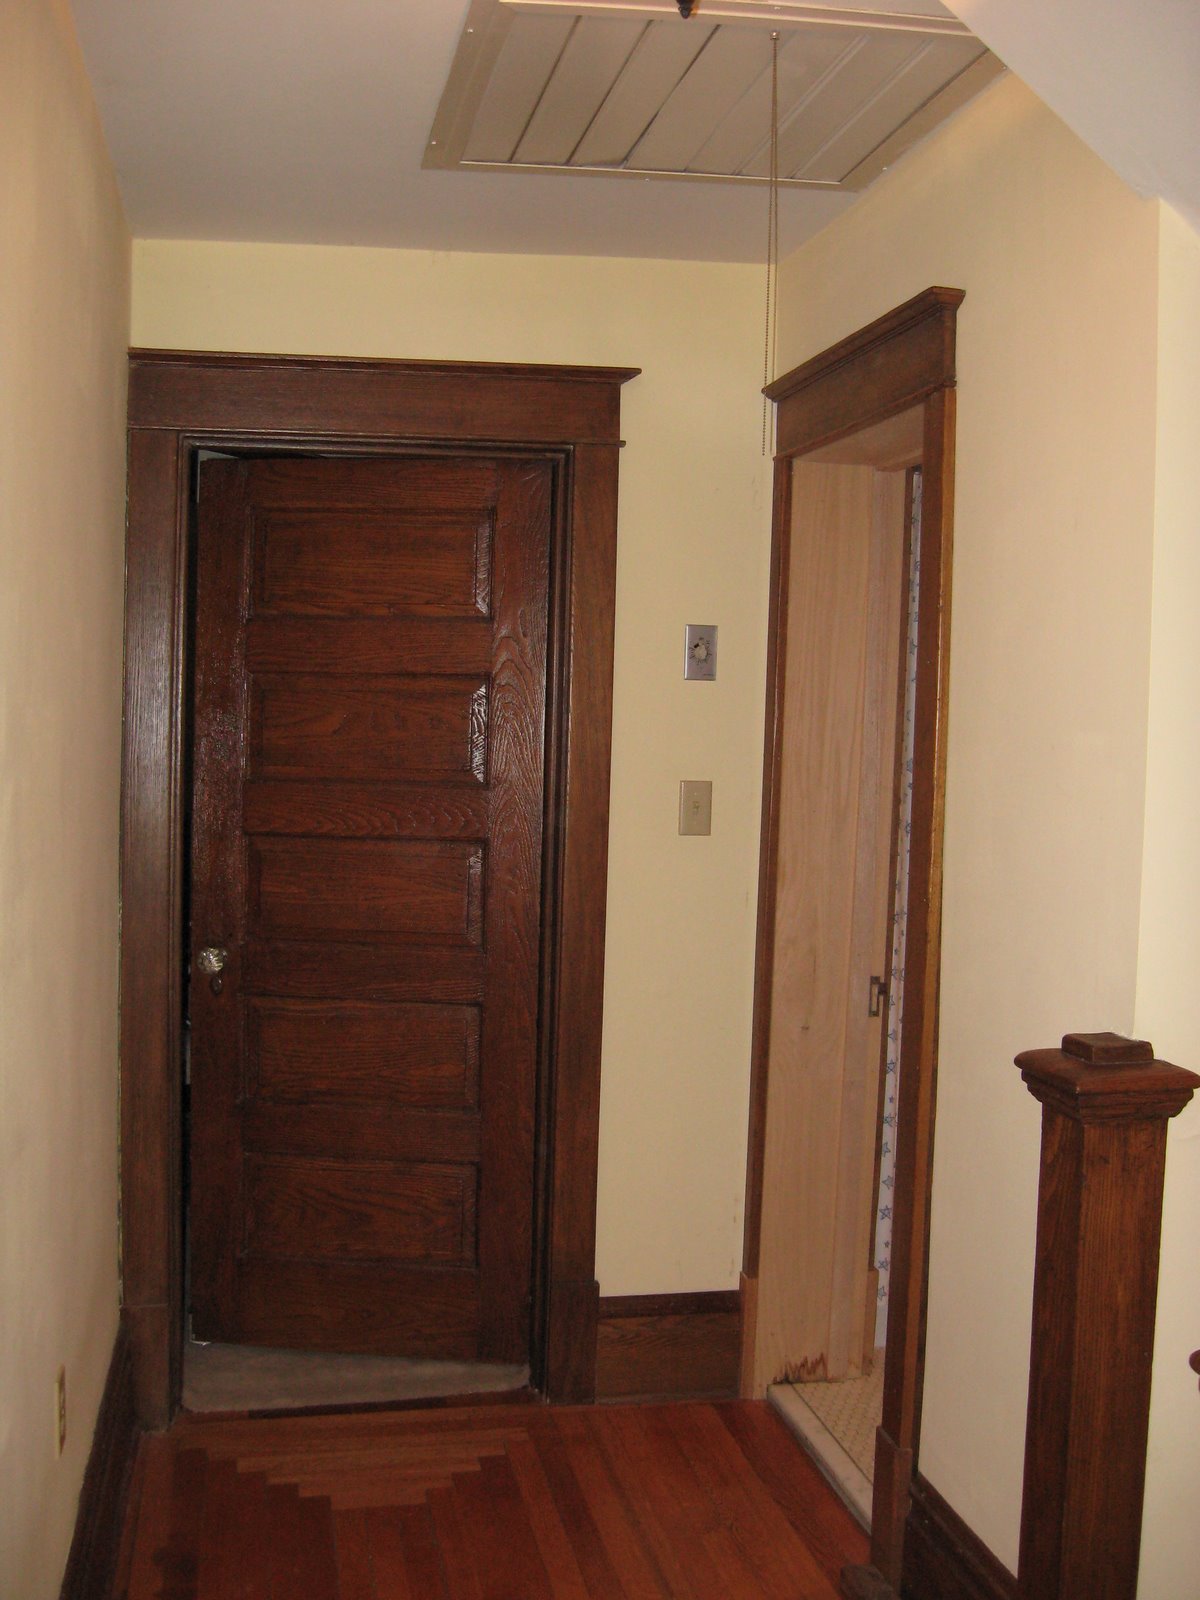 From this angle you can see the staircase to the first floor at the far right, the chimney stack, then the bathroom door (yeah, the jamb still needs some work), and straight ahead is the door to the back bedroom.
In order to enlarge the bathroom a bit, we bumped the bathroom doorway out into the hall a bit and changed the door so it swings inward. This looks totally natural because it is now flush with the chimney stack. Before there was this unnecessary inset for the bathroom door.
It should be noted, however, that moving this wall 18″ required a visit from a building inspector, and he is the reason for the new structural support beam in the kitchen. Which he suggested should have always been there. I was all too happy to have that beam put into place, I didn’t want to always wonder when the bathroom was going to come crashing down into the kitchen!
